Tutorial: Make Giant Paper Flowers
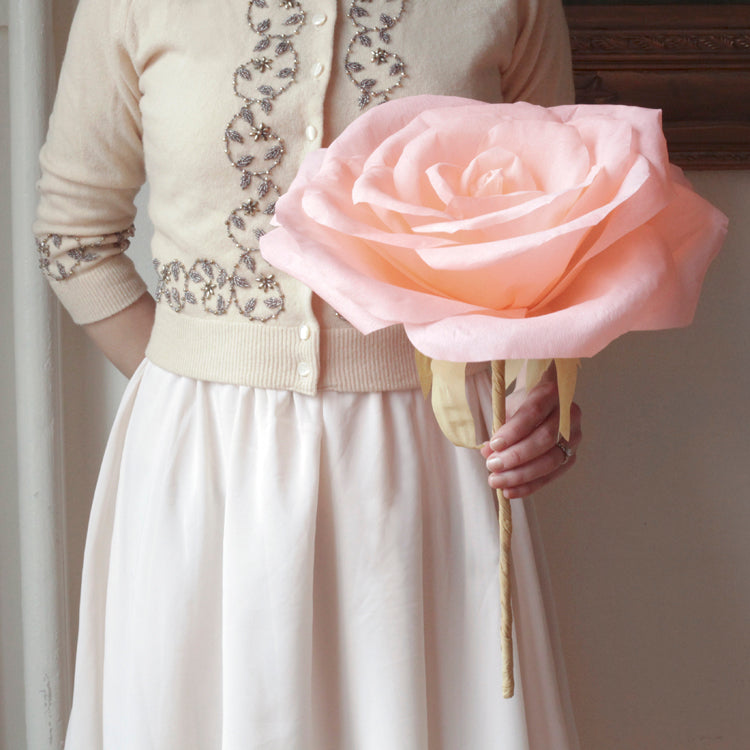
Back when my Storybook Rose tutorial went viral, I started experimenting with different materials for flower-making. I found that the same rose technique could easily be scaled up, and so I started making some giant-sized roses out of pastel colored crepe paper. I've seen some giant flowers made with wrappings of floral tape, but I like the control of hot glue. Building the flowers petal-by-petal means I know exactly how the finished rose will look when it's done.
Supplies:
- 2 Crepe paper folds (one in the petal color, and one in the stem color,)
- 24 inch wooden dowel
- Low temp hot glue gun
- Glue sticks
- Scissors
- Ruler
- Masking tape
Step 1:
Cutting out the petals. These flowers are about 1 foot in diameter when finished, and have about 20 petals total. You need a variety of sizes, and I like to cut them out freehand so each one is a little different. Cut shapes that look vaguely like church windows with a bit of a point at the top. Just eyeball the sizes - there is really no need to be super specific about the petal sizes. Generally, here are the quantities and rough dimensions you should cut out: 3 @ 2 x 6 inches 3 @ 3 x 6 inches 3 @ 4 x 6 inches 1 @ 5 x 7 inches 1 @ 5 x 8 inches 2 @ 6 x 9 inches 2 @ 7 x 10 inches 5-7 @ 10 x 11 inches

Step 2:
Shaping the petals. It doesn't take a lot to shape crepe paper. It's stretchy, so you just need to *gently* pull in a couple key spots to get a nice petal shape.
The first part is to grasp the upper part of the petal, about 1/2 inch in from the edges, and use your fingers to carefully stretch the back of the petal from the center outwards. This will make the top of the petal slightly convex, and the edges will naturally curl back just a bit.
Then, about 1/3 of the way down from the top of the petal use your thumbs to stretch the center of the petal away from you to make it slightly concave. Do this a couple times working your way down to the base of the petal.
Shape all but one of the smallest petals (which you'll use as the rose's center,) and the 5-7 largest petals. Arrange them in order of size.
Step 3:
Take the small un-shaped petal you set aside in the last step, and glue one edge of it to the top of the dowel. Let the petal extend past the tip by about 2 inches. Wrap it all the way around thedowel, and seal the edge with glue.

Step 4:
Begin with the first petal in the smallest size. Use one dot of glue down at the base of the petal to attach it to the dowel. Let the tip of this petal extend about 1/2 inch past the end.
About halfway up the petal, secure the sides with two dots of glue. Add the next petal, overlapping the last one slightly, and attach it in the same way. This time, keep the top tips of the petals flush with each other. 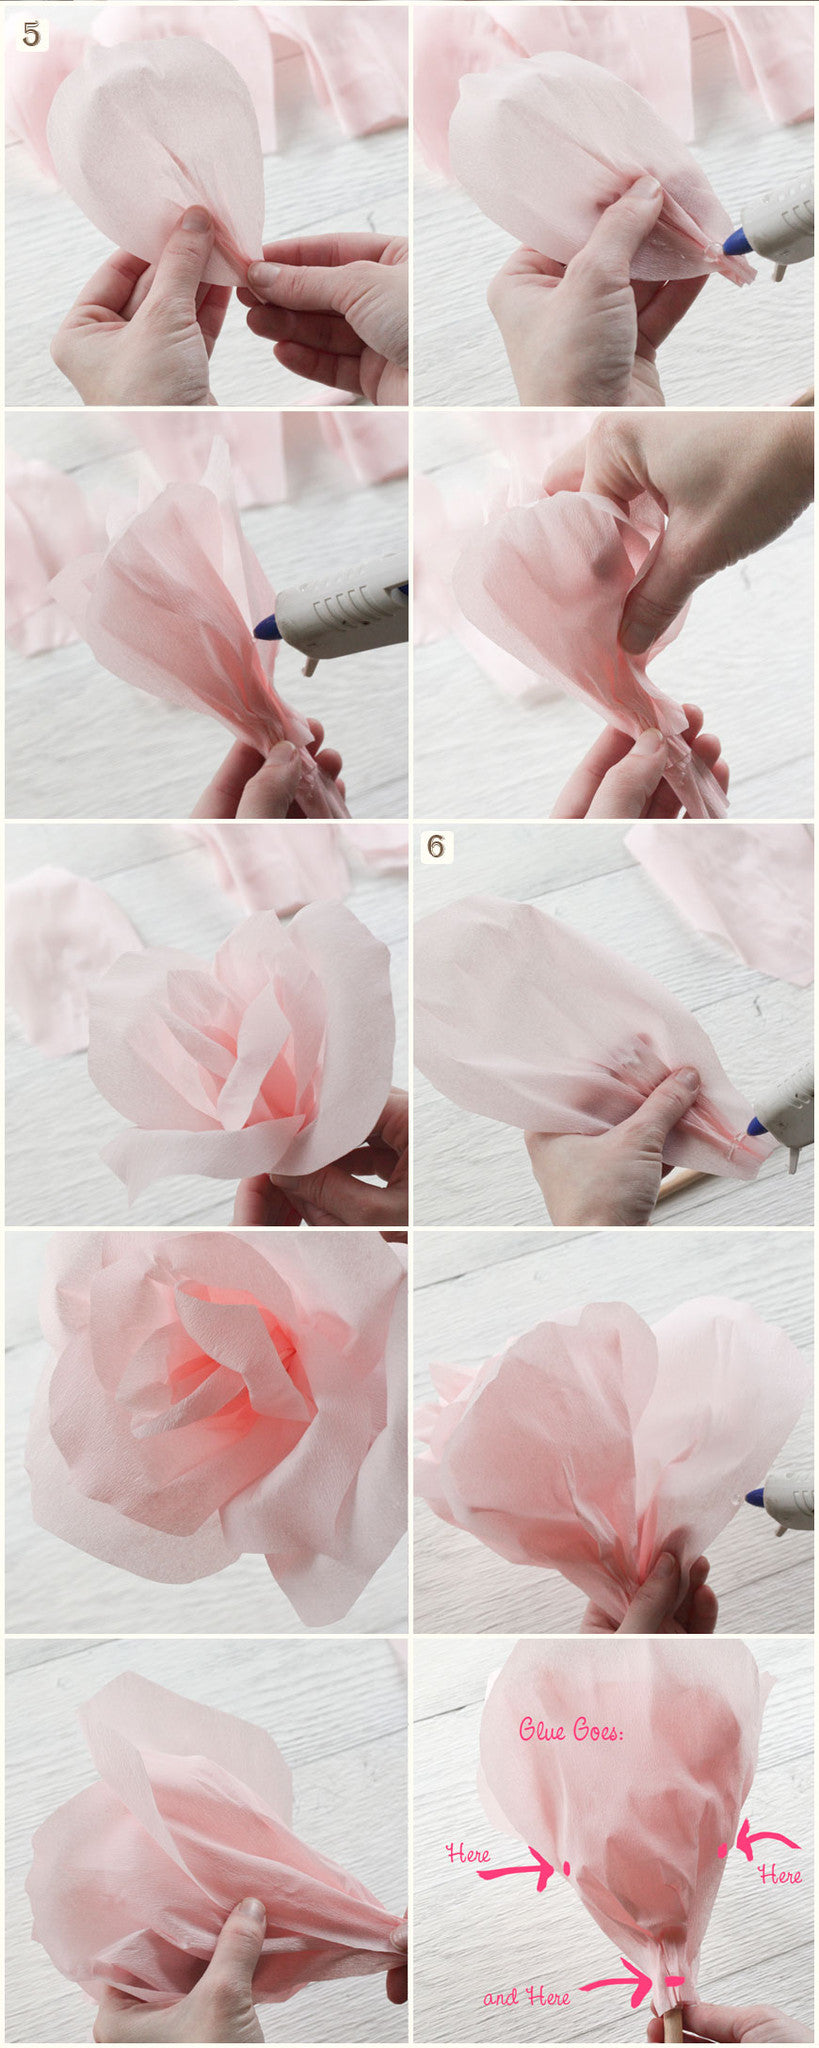
Step 5:
The next petals have wider bases, so you'll need to gather them into little pleats. Then apply the dot of glue to the base, and attach to the flower.
Halfway up the petal, again, use a dot of glue on either edge to secure the petal to the flower. You can reach inside to make sure those glue dots hold. The aim at this point is to keep the top of the flower loose, and open, while the bottom of the flower is tight, and secure.
Step 6:
Even though the petals are getting bigger and harder to handle, it's the same process: Glue at the bottom first, then secure each side to the previous layer of petals.
The largest petals don't really need to be shaped before attaching because they will sort of just shape themselves when you gather the bases. Keep going, and turn the flower as you work, so you can overlap the last petal you applied.
When the flower reaches a certain fullness, I stop adding petals. Each flower ends up a little different, with some taking more petals than others. This looks good. Any fuller, and it could sag a bit. When you are finished adding petals you can go through and curl some of the edges back a bit just to perfect the shape.

Step 7:
Get a piece of masking tape, about 8-10 inches long, and run it around the base of the petals. Get it as tight as possible. 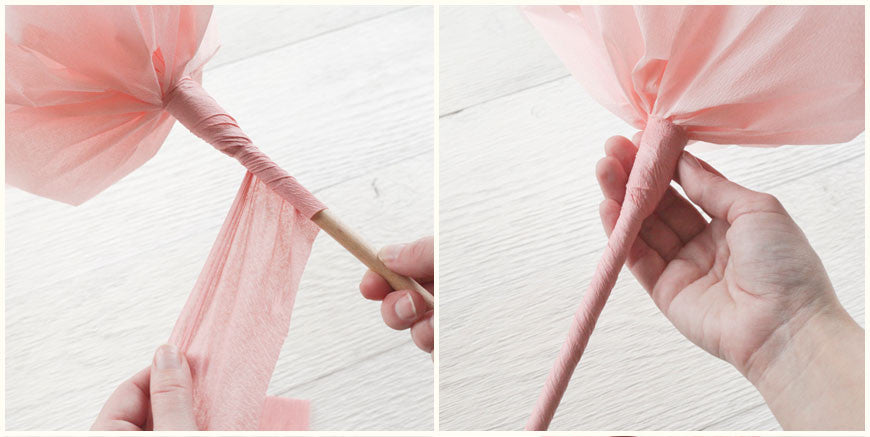
Step 8:
Unfold the crepe paper you have chosen for the stem, and cut a ribbon on a diagonal, about 3 feet long. I decided to do a darker pink for this stem. Ivory or yellow also looks very pretty, and is a little more exciting than using green. With a couple dots of glue on the masking tape, attach one end of the ribbon. Wrap it around the very top of the tape, securing it with glue.
With the top fully secured, begin twisting the dowel while keeping the ribbon taught and stretched. It will pleat and twist on its own. Twist it all the way down to the base of the dowel covering all the wood, and glue the end down, snipping off any excess ribbon.
Step 9:
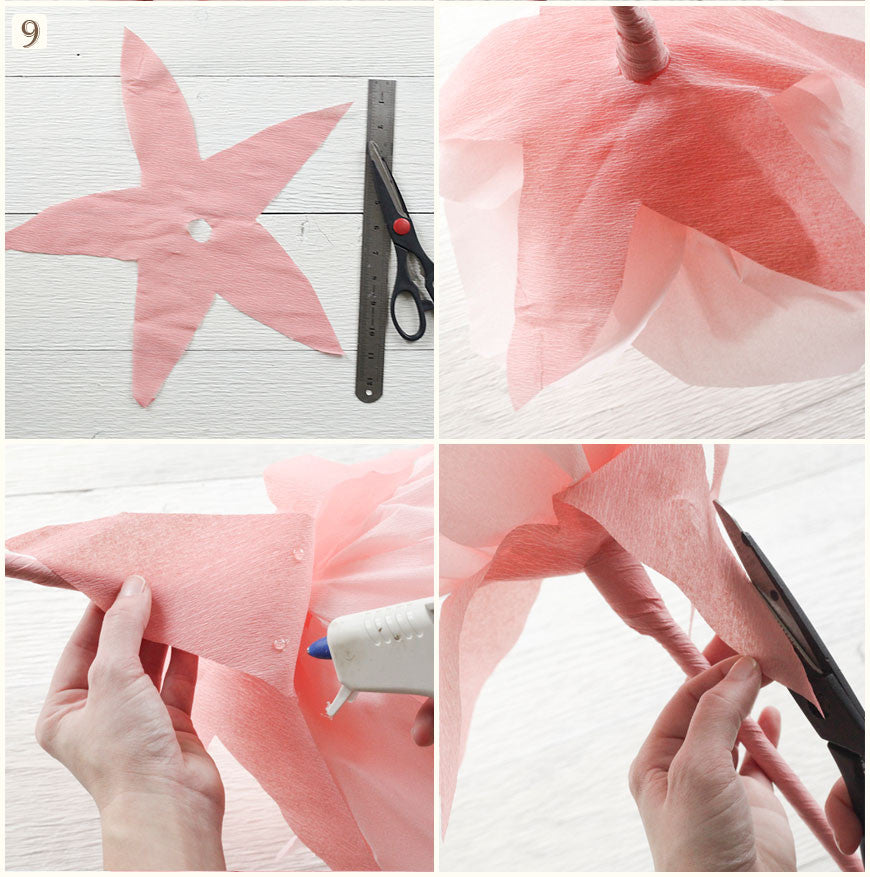
Also using the stem colored paper, cut out a shape like this, about 14 inches across, with a 1 inch hole at the center.
Slide the stem through the hole, and bring this shape all the way up to the base of the flower. Bend back each petal of the shape, and secure it to the flower with two dots of glue.
Use scissors to taper the shape into very fine points, and give them a little stretch.
And, there you have it! Pretty paper roses to give as gifts, or use as decorations for parties or photo shoots.
As always, if you love it, share it!


