Tutorial: Christmas Snow Globe Ornament
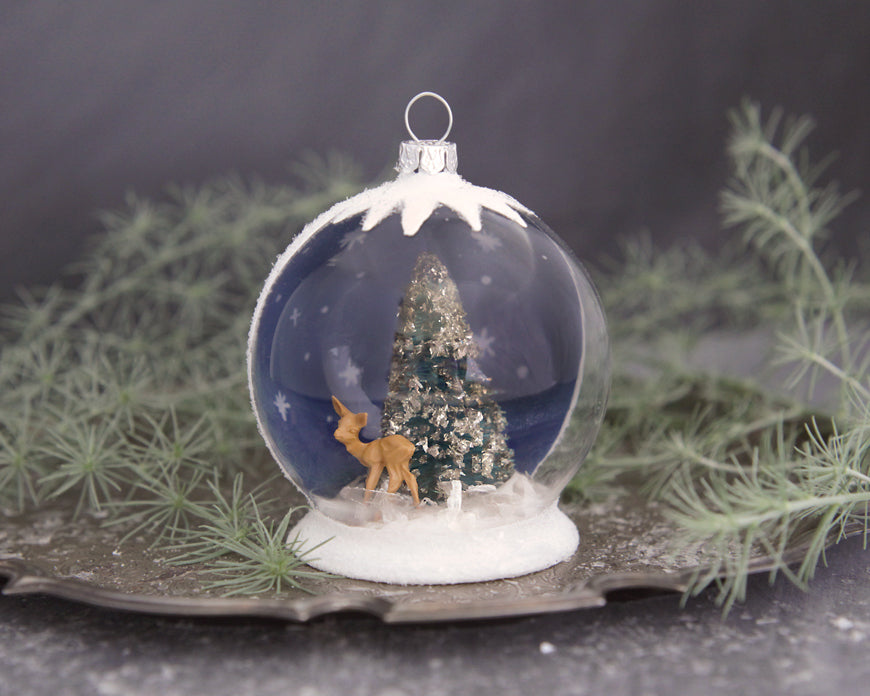
Supplies:
- Clear glass snow globe ornament (note: since publication of this tutorial, this ornament sold out!)
- Acrylic paint in white and midnight blue
- Paint brush & smaller liner paint brush
- White glue
- Clear glitter
- Cotton ball
- Mica or Snow Crystals
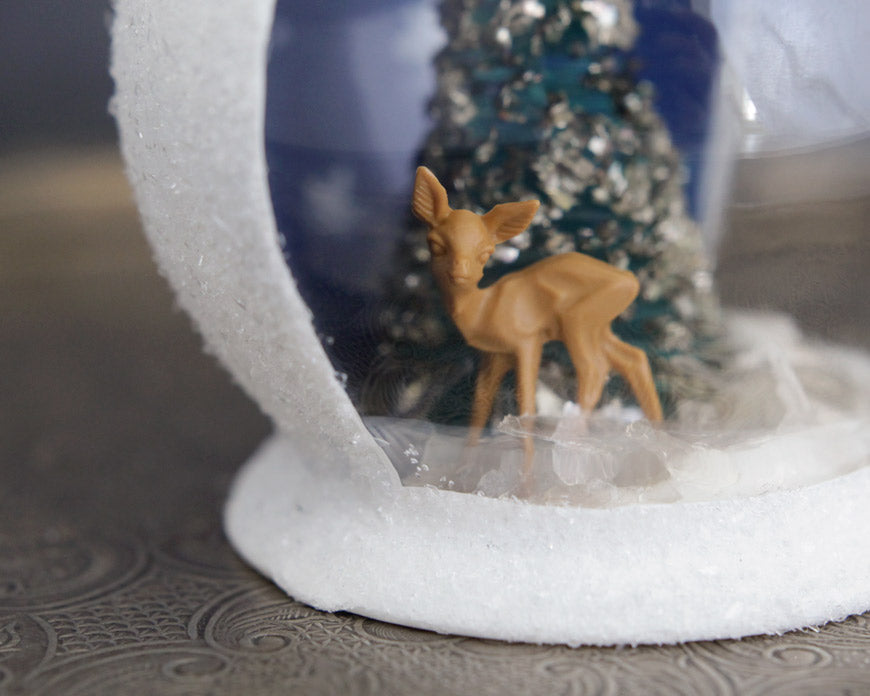
- Miniature plastic deer
- Bottle brush tree
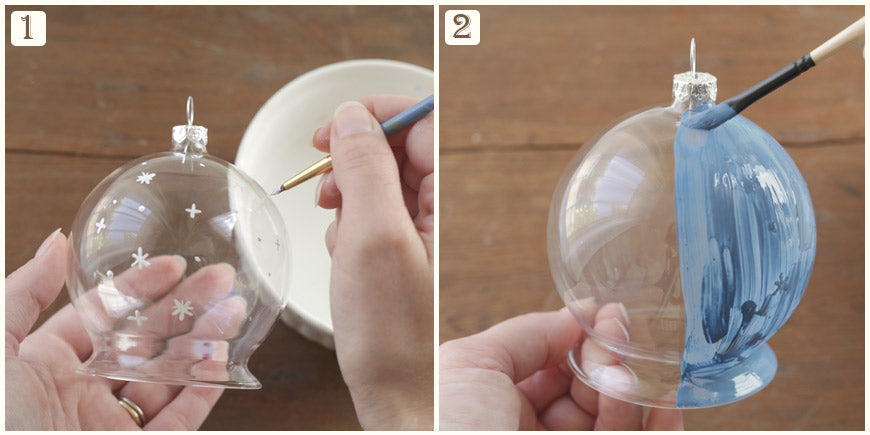
Step 1: Use a small liner paint brush to paint white stars on half of the snow globe. Let dry. Step 2: Once the stars are completely dry, paint OVER them with blue paint, covering half the snow globe. Use gentle strokes with the paint brush to avoid rubbing off the stars. This layer of paint does not need to be thick - you just need to lay down a base coat. Let dry.
Step 3: Add a second, thicker layer of blue paint, so that it is opaque. Let dry. Step 4: Paint over the blue paint with white. Add a stripe of white around the base of the snow globe, and then add a decorative icicle pattern to the top.
Step 5: When the paint is dry, coat the entire painted surface with white glue. Sprinkle with clear glitter. I'm using clear German glass glitter for a vintage effect. Step 6: Unroll a cotton ball to make a long strip. Coat the chipboard circle with white glue, and arrange the cotton strip like a spiral on top of it. Press down to make a flat cotton tuft for the woodland scene to sit on.
Step 7:If your bottle brush tree has a wooden base, snip it off with wire cutters so that the tree has a flat sisal base. Also, check to make sure whatever you are putting inside the snow globe will fit vertically inside the space. Paint a good amount of glue on the bottom of the tree, and press it into place off to one side of the chipboard circle. Step 8:Gently coat the cotton puff with glue, and sprinkle it with mica or snow crystals.
Step 9: Paint the feet of the deer, and add a little glue to the part of the base where he will sit, and press his feet into the cotton. Step 10: Paint glue around the edges of the chipboard circle, and insert the whole scene into the clear glass ball, pressing it into place. Set it on a flat surface until it is dry.
All done! Such a fun holiday project. Hope you get to try it!
As always, if you love it, share it! Pin:


