Putz House Assembly
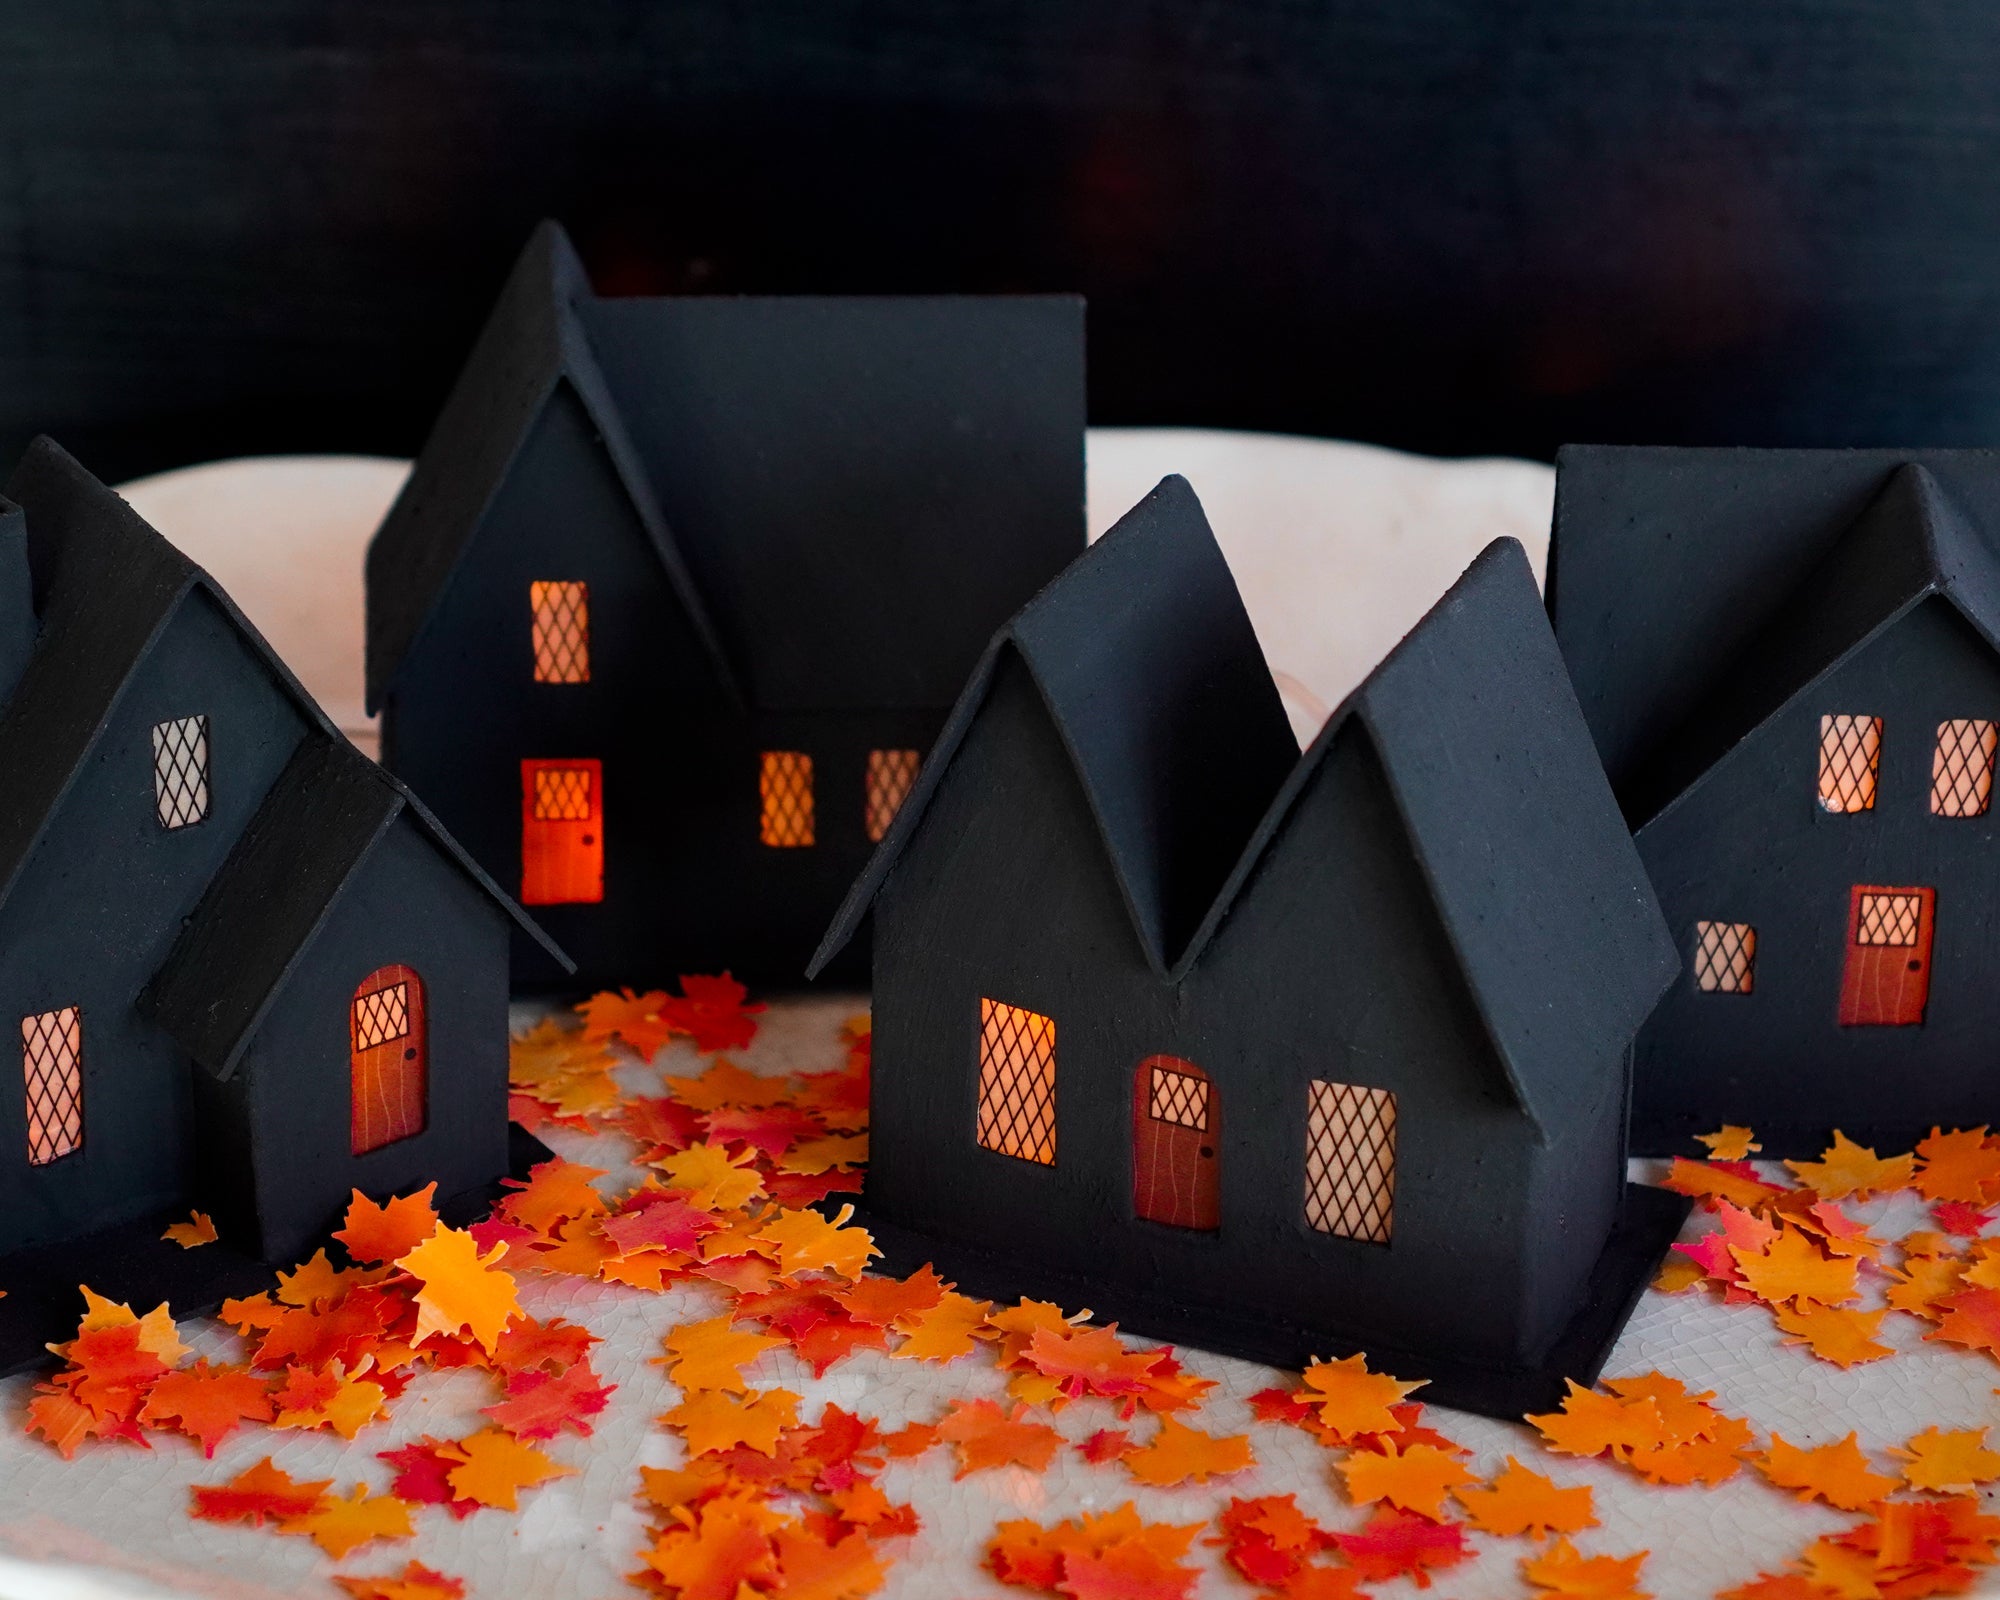
 These chipboard houses are the perfect blank slate for a Christmas village of your own style. The kits come flat, with the pieces already cut out and scored, and each one comes with a translucent sheet with a door and windows.
Kits are available for purchase here.

Assembly:
- For crisp edges, fold all of the components along the scored lines against an object with a straight edge like a bone folder, metal ruler, or acrylic block. Assemble the pieces in the order shown.
- Use a fast-drying liquid glue such as Aleene’s Turbo Tacky Glue or Beacon 3-in-1 Advanced Craft Glue. Apply the glue to the components to be joined, and hold each piece in place for 20 seconds to secure a bond. Let each piece dry before adding the next component.
- If you are planning on painting your house it is recommended to assemble the walls and roof before painting to avoid paint cracking at the corners. The windows and door can be installed after painting to keep them clean, and then the house can be attached to the base.
Assembly video:
The Village House: Order of Assembly

1. Walls: Fold walls and tabs along the scored lines. Glue the side tab to the inside of the back wall.
2. Roof: Apply glue to top edges of side walls and outside of back panel. Center the roof on the back panel so that the overhang is equal on either side, then press the roof down until the glue sets. Roof Accent: Fold & apply glue to angled edge of roof accent and top edge of front peak. Press the roof accent onto the front peak and against the front roof panel.
Paint assembled house walls & roof if desired.
3. Windows & Door: Cut windows and door slightly larger than the openings. Apply glue to the front edges, position inside the house through the open base, and press against the inside of the front wall to attach.
4. Base: Apply glue to the bottom edges of the house and center on the rectangle base.

The Manor House: Order of Assembly

1. Walls: Fold walls and tabs along the scored lines. Glue the side tab to the inside of the back wall.
2. Roof: Fold the roof into an ‘M’ shape. Apply glue to all 8 roof tabs. Center the roof so that the overhang is equal on the front and back, then press the roof down until the glue sets.
Paint assembled house walls & roof if desired.
3. Windows & Door: Cut windows and door slightly larger than the openings. Apply glue to the front edges, position inside the house through the open base, and press against the inside of the front wall to attach.
4. Base: Apply glue to the bottom edges of the house and center on the rectangle base.

The Farmhouse: Order of Assembly

1. Walls: Fold walls and tabs along the scored lines. Glue the side tab to the inside of the back wall.
2. Roof: Apply glue to the four tabs on the left half of the house. Fold the left roof panel along the score line, and center it so that the overhang is equal on the front and back. Press the roof panel down until the glue sets. Fold & apply glue to
angled edge of the right roof panel and the remaining tabs on the house. Press the right roof panel onto the tabs and against the left roof panel. Hold until the glue sets.
Paint assembled house walls & roof if desired.
3. Windows & Door: Cut windows and door slightly larger than the openings. Apply glue to the front edges, position inside the house through the open base, and press against the inside of the front wall to attach.
4.Base: Apply glue to the bottom edges of the house and center on the rectangle base.

The Tudor House: Order of Assembly

1. Walls: Fold walls and tabs along the scored lines. Glue the side tab to the inside of the back wall.
2. Portico: Fold portico walls and tabs along the scored lines. Apply glue to the entire right side wall of house. Line up the back corner of the house with the right edge of the portico wall. Press and hold for 20 seconds to secure a bond and let dry. Apply glue to the small tab on the left side of the portico, adjust the portico so that it is square to the house, and press onto the front wall of the house.
3. Portico Roof: Apply glue to the tab on the left side of the portico, and to the back edge of the small rectangle portico roof. Line up the top edge of the small rectangle with the roofline of the house. Press the long back edge of the small rectangle against the house.
4: Roof: Apply glue to the remaining roof tabs. Fold the roof panel at the center score line. Line up the front edge of the roof panel with the front edge of the portico roof. Press the roof down and hold until the glue sets.
5. Chimney: Fold the chimney piece along the scored lines. Apply glue to the left tab and glue to the inside of the right tab. With the seam at the back, apply glue to the bottom edge of the chimney and press onto the top
of the roof.
Paint assembled house walls & roof if desired.
6.Windows & Door: Cut windows and door slightly larger than the openings. Apply glue to the front edges, position inside the house through the open base, and press against the inside of the front wall to attach.
7: Base: Apply glue to the bottom edges of the house and center on the rectangle base.

Additional details like snowy roofs and glitter coatings can be applied once the houses are fully assembled.
Painting tips: A basecoat of white acrylic gesso can help paint to adhere to the chipboard, and also will help prevent too much moisture soaking into the surface. Apply gesso thinly, allow to dry, and then apply two coats of craft paint to achieve an opaque finish. A mop brush is a handy applicator for applying paint with few brush strokes.

Glitter tips: A salt shaker works great for applying an even sprinkling of glitter. Fine Grain Glitter in Clear allows the color of the paint to show through. Apply glitter one wall at a time. Use a smaller brush to paint an even coat of Elmer's Glue-All to the wall avoiding the door and windows, sprinkle with glitter, and shake off the excess into a bowl. Milk Glass Glitter in Coarse or Fine Grain makes a lovely snow effect for rooftops. Add a little clear glitter to make a sparkling snow mix.
Use LED string lights to illuminate the putz houses.
As affiliates we may earn commission from qualifying purchases.


