Nostalgic Cotton Batting Santa Ornaments
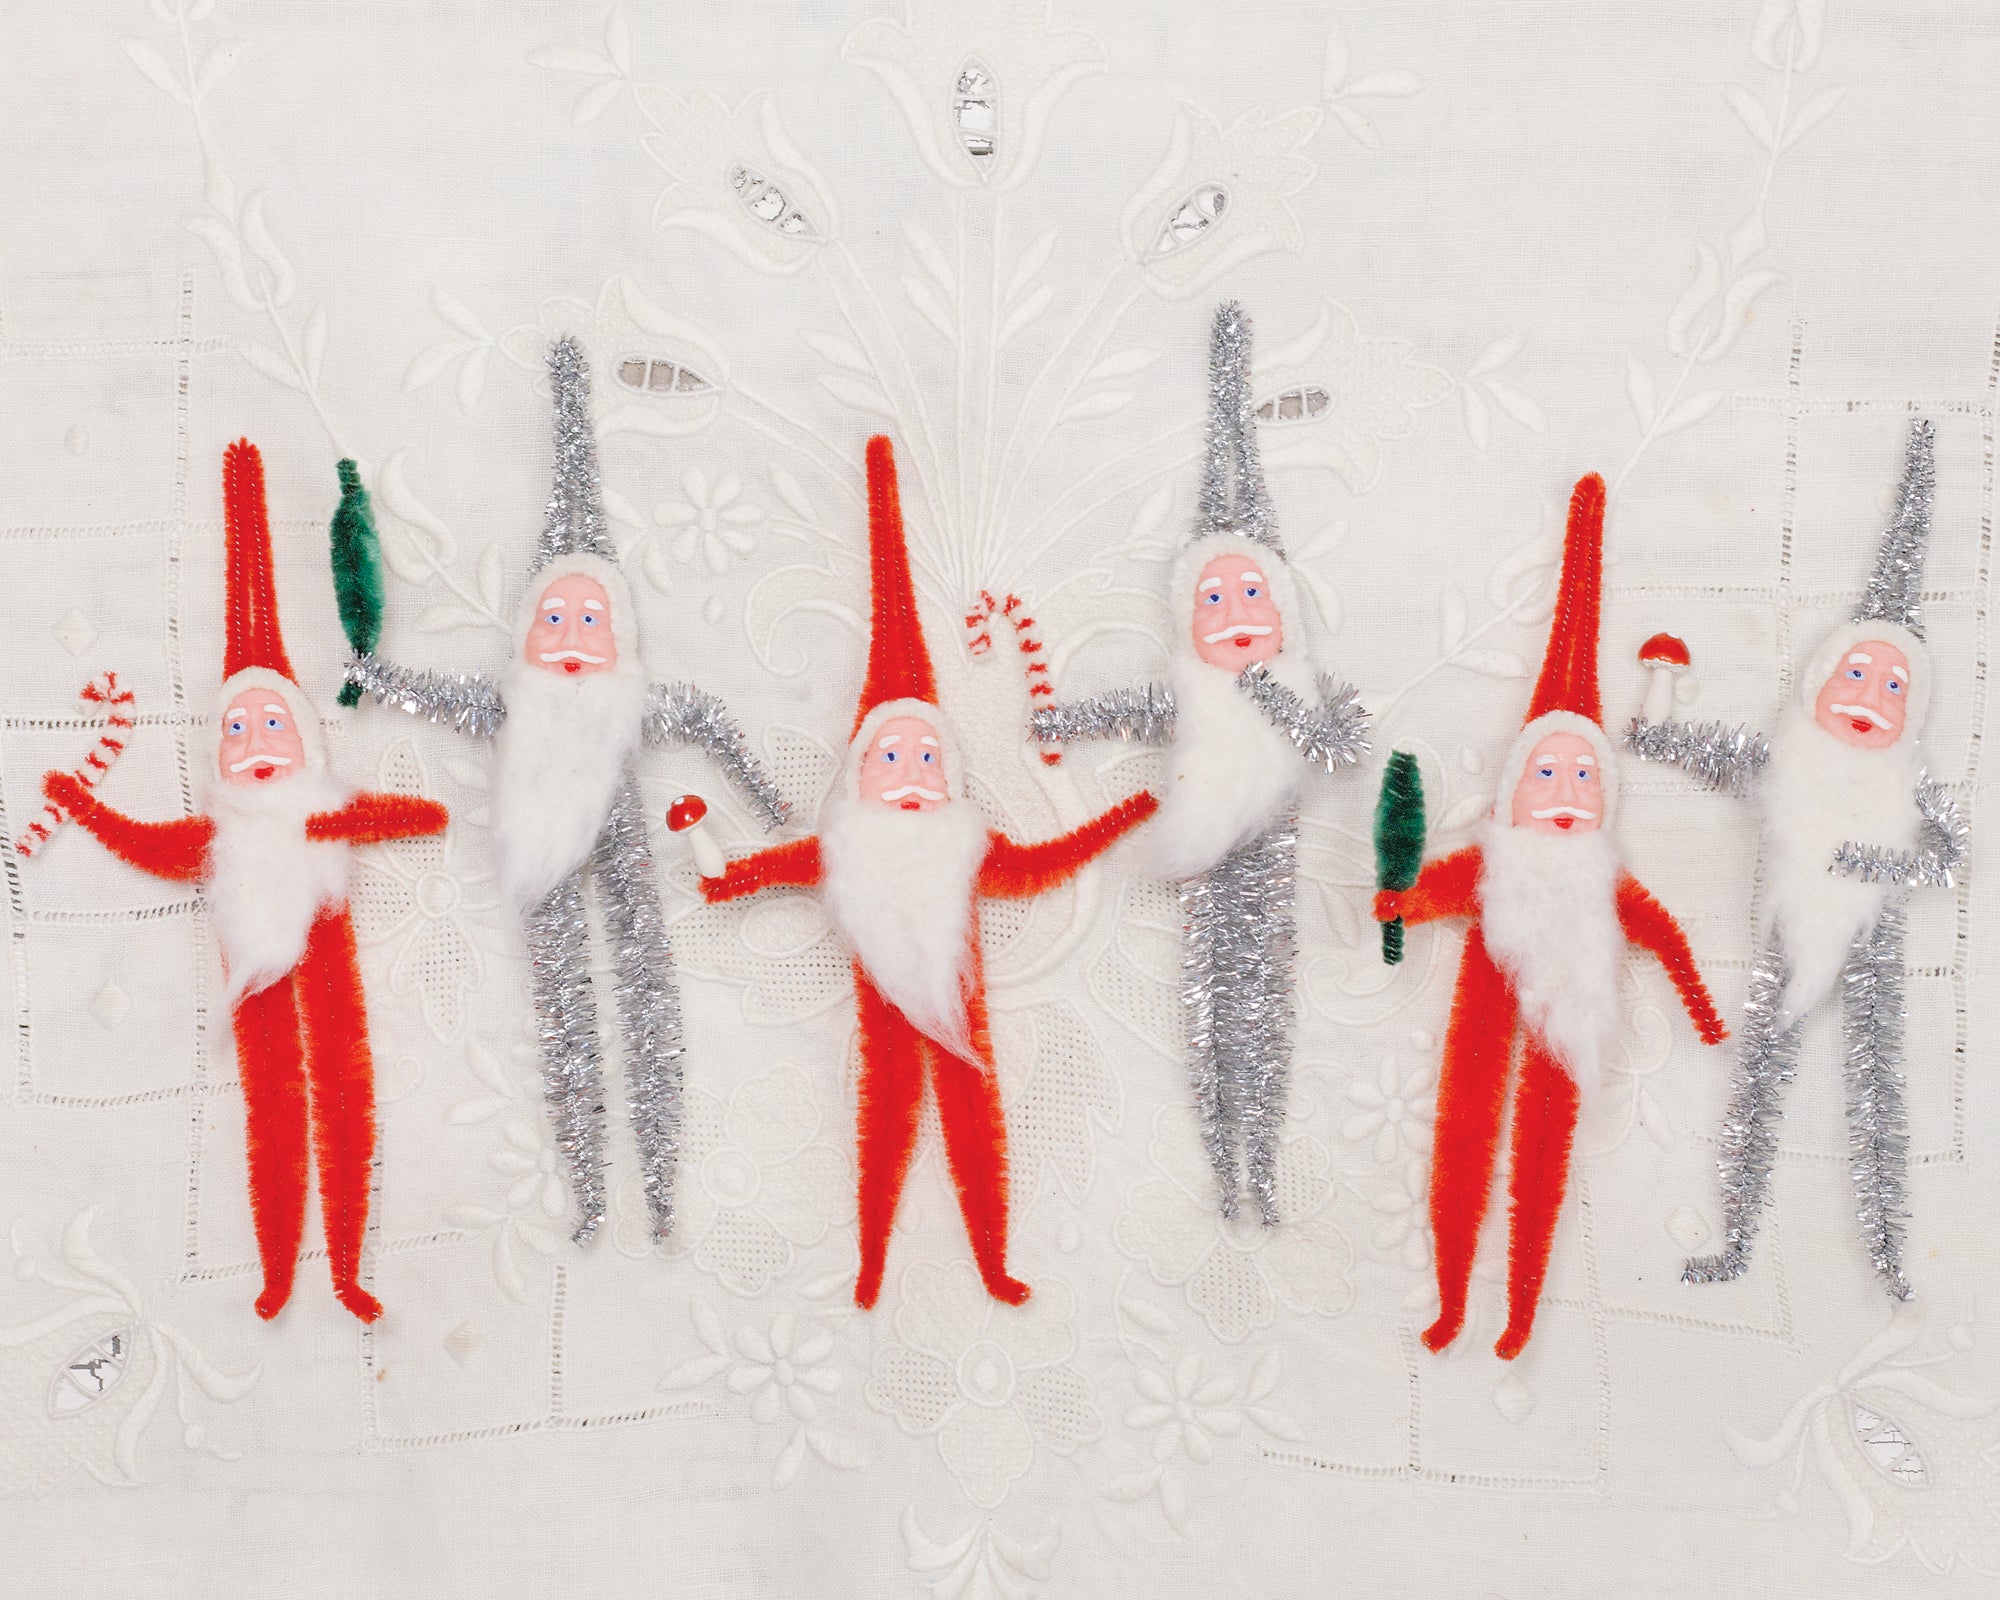
 If you have ever wondered how to make spun cotton figures from scratch, this is a great introductory project to the nostalgic art of spun cotton. For these small-scale antique style spun cotton dolls we will be using quilt batting on an armature of cotton pipe cleaners. The finished figures measure about 4 1/2 inches tall, which is a good size for hanging on the Christmas tree.
Supply kits are available HERE.
As an affiliate I may earn commission from qualifying purchases at no cost to you. I offer these tutorials for free, and your clicks support my work, thank you!
If you are collecting your own materials, you will need the following supplies:
- 100% Cotton Quilt Batting
- Cotton Pipe Cleaners, 6" Length, three per Santa
- Paper or cardstock Santa faces approx. 3/4-1" tall. These are the cardstock faces featured in the project
- Dresden stars or other embellishments
- Miniatures or little trinkets for the Santas to hold
- Ruler
- Sharp Scissors
- PVA glue or Cornstarch for Binding Medium
- Paintbrush
- White glue
- Plate
- Sewing Needle & Button Thread
Armature Template: CLICK HERE to download. Print at 100%, do not scale.

As affiliates I may earn commission from qualifying purchases, at no additional cost to you.
Preparing a Binding Medium:
You can use either watered-down glue or a starch-and-water preparation for this
project. You may find that your prefer one over the other, and each has its own
benefits. Glue mixtures are easier to prepare and dry faster, while starch is the
more traditional binder for spun cotton and leaves a softer texture once dry.
Glue Mixture: Use a low-acid glue such as Neutral-PH PVA glue to
minimize yellowing or discoloration. Mix 4-5 parts water to one part glue.
Starch Medium: Bring 1 cup of water to a simmer in a small pot. Mix
1 Tbsp. cornstarch with a little water to make a slurry. Add the cornstarch
slurry to the simmering water a spoonful at a time, stirring between each
addition, until it is all incorporated. Simmer while stirring constantly for
1-2 minutes, or until the mixture is smooth and lump-free. Transfer to
a jar and let cool to room temperature.
Watch the video for a detailed visual demonstration:
Part 1: Building an Armature
Click Here to download and print template.

Use the armature template as an actual-size reference. You can lay your pipe cleaner armature on top as you build it to check the lengths of each section, and maintain the overall scale of your piece. Each Santa will need three 6" cotton pipe cleaners.

1. Twist the top ½” of two
pipe cleaners together.
2. Bend the pipe cleaners to make an almond-shaped head using the template for a size reference. Twist once or twice to make a neck. Lay a third pipe cleaner horizontally on top to create arms.
3. Wrap the vertical pipe cleaners up and over the arm segment, bringing them back to their original position. This will attach the arms to the body, and make shoulders.
4. Cross the vertical pipe cleaners making a small triangle, Then twist 4 or 5 times until the torso matches the length of the template.
Finish: Bend the legs to form hips, and then fold back the ends of the arms and legs back to adjust the lengths.
Part 2: Wrapping the Hands and Feet
Note: for parts 2, 3, and 4, all of the cotton pieces should be torn instead of cut so that they have feathery edges all the way around. e feathered edges are important for blending seams, and keeping the wrappings from coming undone.
Tear four strips of cotton, one for each limb, measuring approximately 1 x 3 inches.
Starting about ¾ inch from the end of a limb, hold the armature over the end of a cotton strip. Begin wrapping the cotton away from you, wrapping over the end of the strip so that it is secured. Wrap the cotton tightly all the way down the limb, about 1/8 inch past the end. Fold in the cotton tuft at the end of the limb, and wrap back up the other direction until the cotton strip runs out. Smooth the ends of the strip against the surface.
Complete the other three limbs, endeavoring to wrap them with the same amount of tension so that they are all about the same thickness.Brush the surface of the cotton with a light layer of binding medium and use your fingers to smooth out the cotton fibers. Do not fully saturate the cotton as the pipe cleaner armatures can rust.
While the cotton is moist with binding medium, pinch the ends of the legs and bend them about ¼ inch from the ends to make feet. Set the figure on a plate or over a cup to dry.

Part 3: Applying Sleeves and Pant Legs
Tear four rectangles of cotton: two 2 ½ x 3 inches for the pant legs, and two 2 x 3 inches for the sleeves.
Lay each cotton rectangle horizontally on a plate. Brush the lower ½ inch of each with binding medium, fold up the edge, and brush it in place. This will create finished-looking edges for the hems.
For each limb, lay the armature over the short side of a cotton rectangle with the folded edge facing in at the ankle or wrist. Wrap the limb, wrapping over the entire short end so that it is secure.The sleeve or pant leg will form a cylindrical shape as you wrap it. When you reach the end of the cotton, smooth the feathered edges against the surface with your fingers in the same direction that the cotton was applied.
When all four pieces are applied, brush with a light coating of binding medium, and smooth with your fingers. Pose the legs as you like while they are moist. Leaving the arms un-posed will make building out the body and coat easier. They can be posed later by re-wetting the surface with binding medium.

Part 4: Filling out the Head and Body + Attaching the Hood
Tear a strip of cotton about 1 x 6 inches, and wrap this piece around the head.
Tear a strip of cotton about 3 x 6 inches, and fold it in half lengthwise.
With the folded end up, wrap this piece under the armpits and around the torso of the figure to fill out the form.With some white glue, attach the Santa face to the head.
Tear a strip of cotton 1 ½ x 3 inches for the hood. Lay it on the plate and finish one of the long edges by brushing ½ inch with binding medium, and folding it over. Position the folded edge on top of the head, and a little bit forward over the forehead. Apply the hood one side at a time: bring one side down around the side of the face, and direct the rest of the strip around the back of the head. Brush this piece in place. Then, apply the other side of the hood, down the other side of the face and around to the back. On the back of the head, this side overlaps the first and will create a hood shape. The remaining fluffy edges of the strip can be pressed against the side of the head and brushed down to blend. Once the hood is formed, brush the whole shape with binding medium to make it permanent.

Part 5: Adding Coat and Collar
Tear a rectangle about 3 x 5 inches. Fold in one of the long edges to finish the bottom edge of the coat. Lay the cotton piece on the front of the figure with the left edge lined up with the left side of the body. Position it so that the feathered edges run along the side of the body and up to the shoulders. Smooth the left edge down against the body, and then wrap the cotton around the figure. You may need to tear small slits at the armpits to allow the wrapping to continue. You may either paste the front edge down with binding medium for a seamless look, or fold it under to make an opening for the coat.
To make a coat opening, use binding medium to fold under the front edge, and then glue the flap in place. Brush both the coat and sleeves with binding medium. Gently pose the arms, bending them at the shoulders and elbows.
For the collar, use scissors to cut a strip of cotton about 1 ½ x 4 inches with the lower corners rounded off. You may adjust the size and shape of this piece to look more like a collar or cut a wider crescent shape to make a cape. Wrap around the shoulders, covering the shoulder seams, and overlap at the front. Accent pieces like this can be layered, glued in place, and then brushed with binding medium to unify the costume.

Part 6: Finishing and Variations
You may embellish the costume with various trims cut from cotton: a strip running down the front of the coat, or around the hems of the arms and legs, or cut and apply small patch pockets.
Included in the kit you will find tiny Dresden paper stars which may be cut out and applied as buttons. If you would like Santa to hold a small trinket, glue miniatures under the arms or to the hands.
To add a hanging loop to make the Santa into an ornament, poke a needle through the hood behind the face. Allow the piece to dangle from the needle and adjust its position to find the spot where the figure hangs straight. Use the needle to pull through a small piece of button thread and tie a knot to make a loop.
Working in color: Before crafting, the cotton batting can be dyed with Rit fabric dye to make colorful variations (dye not included.) Follow the mixing instructions on the dye package to prepare a hot dye bath in a sink. Pre-soak the batting in water, pressing out the excess before adding to the dye. Agitate for about 15 minutes, squeezing the dye through the batting to ensure it is fully colored before rinsing until the water runs clear. Hang on a line, or lay on paper towels to dry.


